In case this is the first post you've read on my site, it's important to know that I purchased a complete airframe kit with the toe break and parachute options from a previous builder. The rear fuse was nearly complete and the center fuse was partially complete. Unfortunately, some of the center fuse work was completed out of order, so I'm dealing with fixing those issues. But, I did determine that the rudder pedals could be installed and have some important knowledge to share if you're going to get the toe brake option.

Right off, I would like to say there was a point that I would have opted for the toe brake option. I flew with them in my first Sling 4 Turbo ride. When I test flew the TSi, it had only the hand brake. The TSi, with only the hand brake, was able to pivot turn around a main wheel with just the nose wheel alone. That convinced me that I could live without the toe brakes and gain the advantage of adjustable rudder pedals, lower weight, and lower cost. The only awkward part was using both hands to set the parking break.
The rudder assembly with toe brakes in my kit came pre-assembled. I don't know if that was an upgrade on top of the upgrade, but it's less work, right? No. For me, it made the install more difficult. Besides some interference with using tools caused by the pre-assembled parts, the entire assembly is awkward to handle. However, that all can be overcome.
In the photo below, the previous builder already laid out the Pedal Mounting Channel (CF-CHL-024-C-C-). Consequently, that rivet in the middle of the channel closest to the near edge doesn't belong there. Those two rows of 4x rivet holes are for mounting the bush brackets. It needs to be drilled out.

Below, the rivet was bonded behind a bridge patch (patch removed). The rivet hole lined up with the spine of a C-channel, so the previous builder drilled it out and created the patch. Except for the fact that the rivet should have gone in to hold the bush bracket, the work was well done.

Removing the rivet from the bonding was a pain. I cleaned everything out and fit the bottom bush brackets.


It's important to note that the underneath the floor skin (got to be careful when saying that out-loud) are some C-channels and the exterior belly skin. There's a small void between the two skins, but it's riveted together per the instructions on E6. I'll get back to why this is important in a moment.
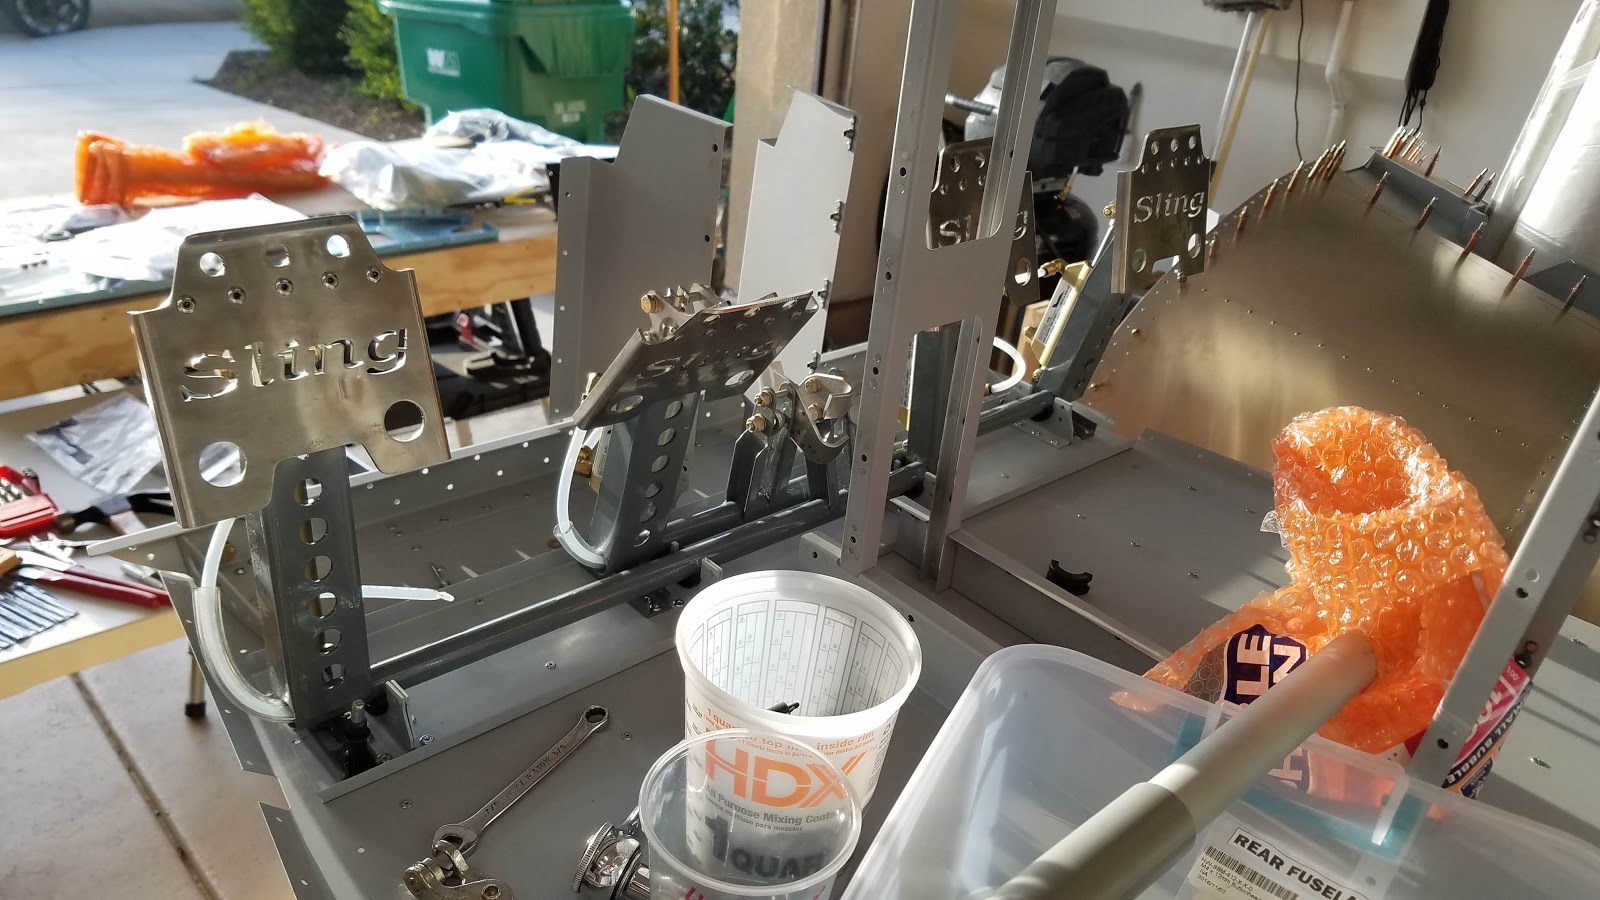
From the next photos, you can see position of the brake actuator interferes with the rivet mandrel. Removing the lower bolt, it becomes apparent that no rivet gun head is going to fit between the steel brackets. And there are two rivet holes down there.


I piled up as many rivet wedges and washers as I could, but still couldn't get a good grip on the mandrel.


Right off, I would like to say there was a point that I would have opted for the toe brake option. I flew with them in my first Sling 4 Turbo ride. When I test flew the TSi, it had only the hand brake. The TSi, with only the hand brake, was able to pivot turn around a main wheel with just the nose wheel alone. That convinced me that I could live without the toe brakes and gain the advantage of adjustable rudder pedals, lower weight, and lower cost. The only awkward part was using both hands to set the parking break.
The rudder assembly with toe brakes in my kit came pre-assembled. I don't know if that was an upgrade on top of the upgrade, but it's less work, right? No. For me, it made the install more difficult. Besides some interference with using tools caused by the pre-assembled parts, the entire assembly is awkward to handle. However, that all can be overcome.
In the photo below, the previous builder already laid out the Pedal Mounting Channel (CF-CHL-024-C-C-). Consequently, that rivet in the middle of the channel closest to the near edge doesn't belong there. Those two rows of 4x rivet holes are for mounting the bush brackets. It needs to be drilled out.

Below, the rivet was bonded behind a bridge patch (patch removed). The rivet hole lined up with the spine of a C-channel, so the previous builder drilled it out and created the patch. Except for the fact that the rivet should have gone in to hold the bush bracket, the work was well done.

Removing the rivet from the bonding was a pain. I cleaned everything out and fit the bottom bush brackets.


As you can tell by the color of the clecos, 4mm rivets are used. Next comes the first of several surprises regarding the rudder pedals with toe breaks.
I start trying to cleco the base of the rudder pedals using the black clecos and realize the clecos aren't fitting. The holes in the pedal bases aren't sized for 4mm. They are sized for the 3.2mm. The rivet holes in the rudder channel are sized for 4mm, so I drilled up the pedal bases to 5/32".

From the next photos, you can see position of the brake actuator interferes with the rivet mandrel. Removing the lower bolt, it becomes apparent that no rivet gun head is going to fit between the steel brackets. And there are two rivet holes down there.


I piled up as many rivet wedges and washers as I could, but still couldn't get a good grip on the mandrel.

I ended up having to spread the bracket apart enough to fit the maximum number of wedges and washers and the rivet gun head down as far as possible to get the pull. The other side of the bracket also has two rivet holes, but the sides of the brackets are much lower and the pull can be accomplished with just two wedges. If you don't have wedges, get some!
At this point, I realized it would be easier to install these base brackets from underneath the pedal channel and floor skin, but the outer belly skin was already riveted on. This is where I would suggest the Airplane Factory adjust the build instructions for unsuspecting builders to install these brackets before mating the floor and belly skins.
After several hours of work and problem solving, I completed the installation. Here are some in progress photos:


You'll notice in the photos above and below that the outer pedal brackets could be riveted from below the floor skin. This is because the floor skin laps over the belly skins slightly and creates a void when the outer side skins are attached.


In the end, I only needed to spread that one bracket to fit the rivet gun nose. Of the three remaining brackets, two are just like the one I had to spread, but they reside on the outside edges and I could rivet from below. The fourth bracket has high walls in the middle, but the side walls of four outer rivet holes are low and can be rivet from above with a couple of wedges.
If you are unable to rivet the pedal bases from below, I'd suggest ordering two 4mm with extra long mandrels and stacking up a ton of wedges and washers and make the pull without spreading the brackets. I don't even know if they make extra long mandrels, so let me know if you find any.
Comments
Post a Comment