It's time to turn my focus towards the fuselage. I spent time this weekend installing the flight controls and re-installing some torque tubes. Previously, I needed to remove the bushings and tubes for the elevator and flap controls in order to install the aileron autopilot servo brackets.
Below, I'm getting ready to position the control stick tubes:

Checking the orientation of the control stops (center of tube) on the elevator torque tube. This doesn't need to be installed just yet and having it out makes it easier to attach the aileron rose joints.

I installed soundproofing in the control box:

Top bushing bracket installed. Originally, I had only one correct top bushing bracket and one incorrect top bushing bracket. It took four months to get a replacement.

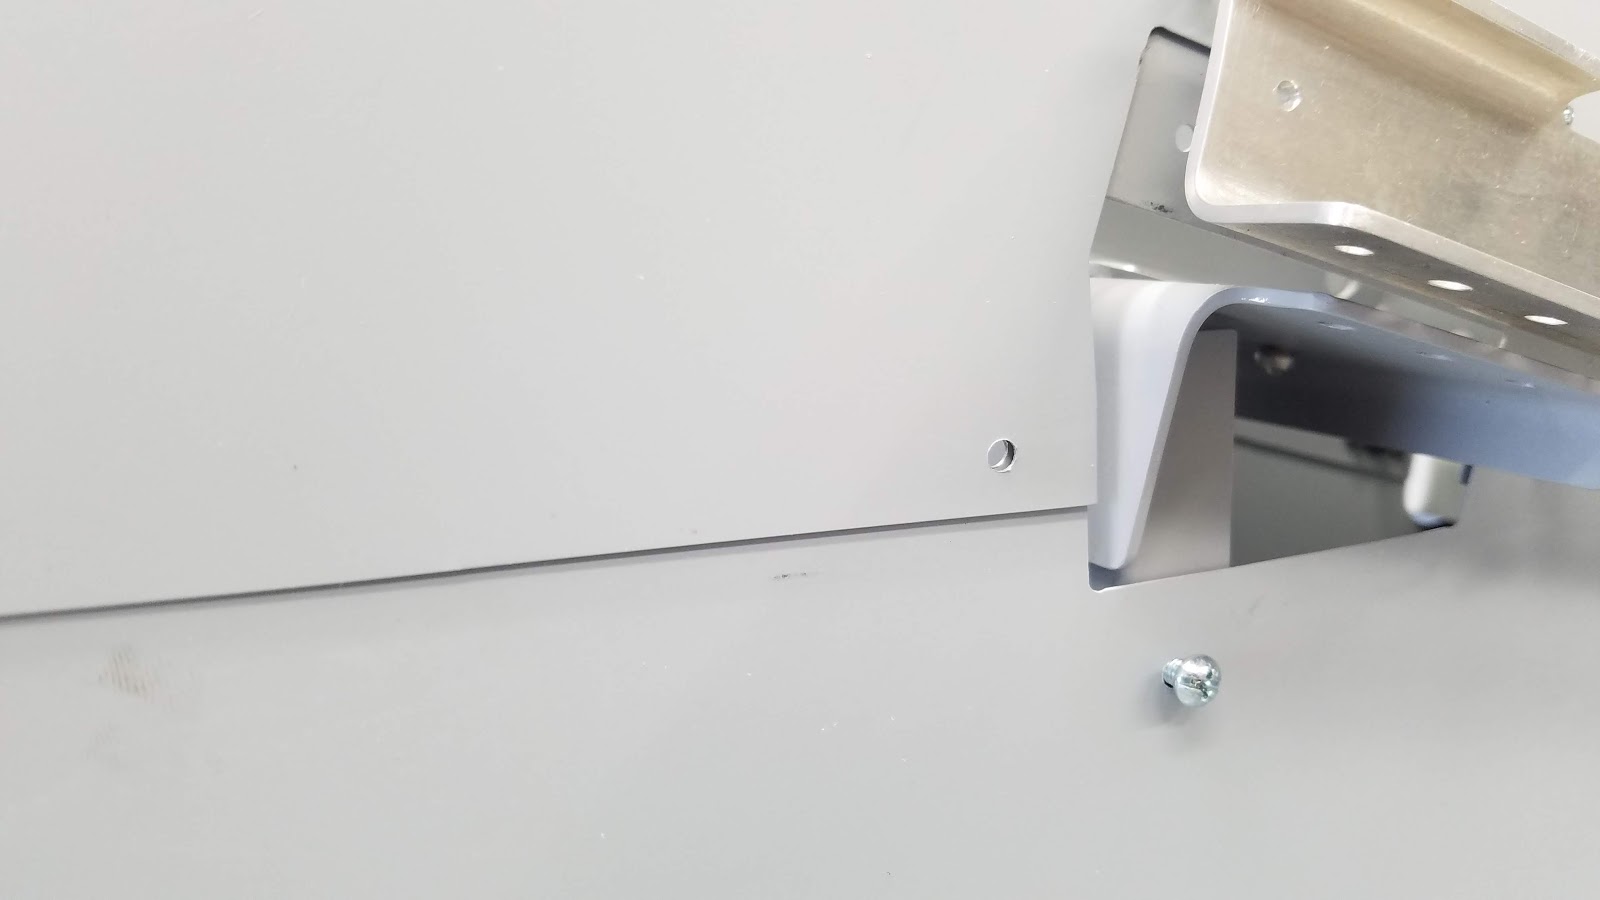
The rear and bottom bushing bracket for control stick torque tube:

Riveting complete and start fitting the aileron cross control tube and rose joint. The bolt comes from the front bracket, through two washers, the rose joint, two more washers, the rear bracket, the control stop spacer (or bushing), a fifth washer and the locknut. The space between the brackets was about 2mm short of being wide enough to accommodate four washers and the rose joint. I widened it using five composite shims (the kind you use to shim cabinets) and a rubber mallet.

The bolt with all the hardware. I found it very difficult (and very frustrating) to get all the hardware on the bolt by bringing the bolt in from the rear. I failed a dozen times to get all the hardware on due to the awkwardness of the small space and interference from the main spar. So, I started with the bolt going the opposite direction and easily fit it through the hardware and out the other side. Then, I butted another bolt coming the correct direction and pushed the original bolt out. This technique worked the first time, on both sides.

You can actually see the starter bolt lying beyond the control stop in the photo below:

A view of both controls connected by the aileron cross control tube. I'm leaving the hardware loose until rigging time. It's clear the tube needs to be extended.

Installed the short autopilot CT as well:

The elevator CT from the control stick. Spacing between the brackets was perfect.

The elevator CT to torque tube rose joint. The bracket space is a little wide here, but there's only room for one thin washer. I may replace the two washers with four thin washers.

Below are the three right-side bushing brackets re-installed:

One of the three left-side bushing brackets finished:

All done re-installing the torque tube bushing brackets. It took just as much time as it took to take them out. I hope you never have to do that!


These floor panels below were partially finished when I acquired the kit. I realized that I had gotten immune to the clecos and open rivets holes, so I decided to finish it off.

All finished!
In Jim Pavlick's blog, he noted a flange from the inside skin rivets down behind the vertical skin that comes off the floor (see rivet holes on left). There is also a channel that rivets from the top three holes to the outer skin for added support. Need to remember this.

I test fitted the panel covers before and noted several missing and misaligned rivnuts. It's time to revisit and fix those now:

The previous builder didn't exactly follow the guidance on these panels to the letter.

The piece in the middle (with the large holes) is supposed to be on the outside of the panels. The previous builder added nutplates to it to allow the screw configuration you see. But the nutplates, or rivnuts, should be in the outer panels and the outer panels should be behind the center plate. The center plate is supposed to be riveted to the seat rail as well.

Some more photos for the log:

The instructions call for these two panels to be riveted together. I've tested taking them off and putting them on while cleco'd together, however, pictures from other blogs with the interior finished panels indicate some separation. I need to get my hands on any guidance regarding the interior kit.

Capturing some views of the interior:

I thought I'd throw the seats and throttle quadrant in for good measure:


Marking spots where rivnuts are needed.


Below, I'm getting ready to position the control stick tubes:

Checking the orientation of the control stops (center of tube) on the elevator torque tube. This doesn't need to be installed just yet and having it out makes it easier to attach the aileron rose joints.

I installed soundproofing in the control box:

Top bushing bracket installed. Originally, I had only one correct top bushing bracket and one incorrect top bushing bracket. It took four months to get a replacement.

The rear and bottom bushing bracket for control stick torque tube:

Riveting complete and start fitting the aileron cross control tube and rose joint. The bolt comes from the front bracket, through two washers, the rose joint, two more washers, the rear bracket, the control stop spacer (or bushing), a fifth washer and the locknut. The space between the brackets was about 2mm short of being wide enough to accommodate four washers and the rose joint. I widened it using five composite shims (the kind you use to shim cabinets) and a rubber mallet.

The bolt with all the hardware. I found it very difficult (and very frustrating) to get all the hardware on the bolt by bringing the bolt in from the rear. I failed a dozen times to get all the hardware on due to the awkwardness of the small space and interference from the main spar. So, I started with the bolt going the opposite direction and easily fit it through the hardware and out the other side. Then, I butted another bolt coming the correct direction and pushed the original bolt out. This technique worked the first time, on both sides.

You can actually see the starter bolt lying beyond the control stop in the photo below:

A view of both controls connected by the aileron cross control tube. I'm leaving the hardware loose until rigging time. It's clear the tube needs to be extended.

Installed the short autopilot CT as well:

The elevator CT from the control stick. Spacing between the brackets was perfect.

The elevator CT to torque tube rose joint. The bracket space is a little wide here, but there's only room for one thin washer. I may replace the two washers with four thin washers.


One of the three left-side bushing brackets finished:

All done re-installing the torque tube bushing brackets. It took just as much time as it took to take them out. I hope you never have to do that!


These floor panels below were partially finished when I acquired the kit. I realized that I had gotten immune to the clecos and open rivets holes, so I decided to finish it off.

All finished!
In Jim Pavlick's blog, he noted a flange from the inside skin rivets down behind the vertical skin that comes off the floor (see rivet holes on left). There is also a channel that rivets from the top three holes to the outer skin for added support. Need to remember this.

I test fitted the panel covers before and noted several missing and misaligned rivnuts. It's time to revisit and fix those now:

The previous builder didn't exactly follow the guidance on these panels to the letter.

The piece in the middle (with the large holes) is supposed to be on the outside of the panels. The previous builder added nutplates to it to allow the screw configuration you see. But the nutplates, or rivnuts, should be in the outer panels and the outer panels should be behind the center plate. The center plate is supposed to be riveted to the seat rail as well.

Some more photos for the log:

The instructions call for these two panels to be riveted together. I've tested taking them off and putting them on while cleco'd together, however, pictures from other blogs with the interior finished panels indicate some separation. I need to get my hands on any guidance regarding the interior kit.
Capturing some views of the interior:

I thought I'd throw the seats and throttle quadrant in for good measure:


Marking spots where rivnuts are needed.


Comments
Post a Comment